If you want to create your own e-commerce site and sell your products through your site, follow the steps below.
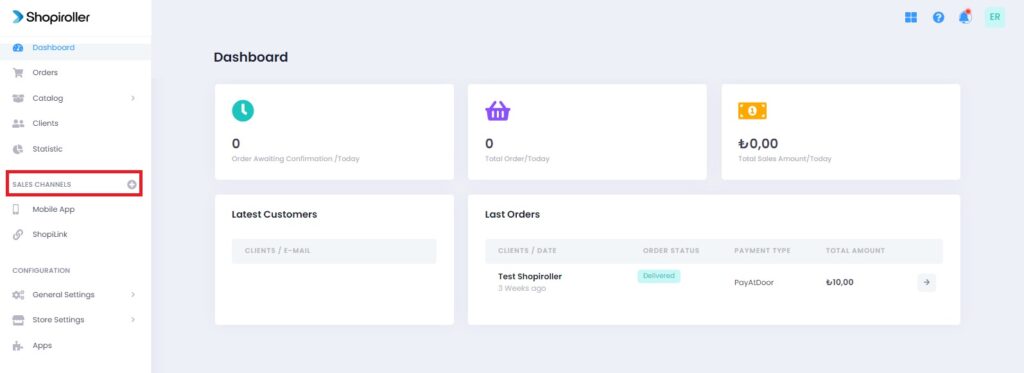
1) After logging in to your store, click on the “+” button to the right of the “Sales Channels” on the left.
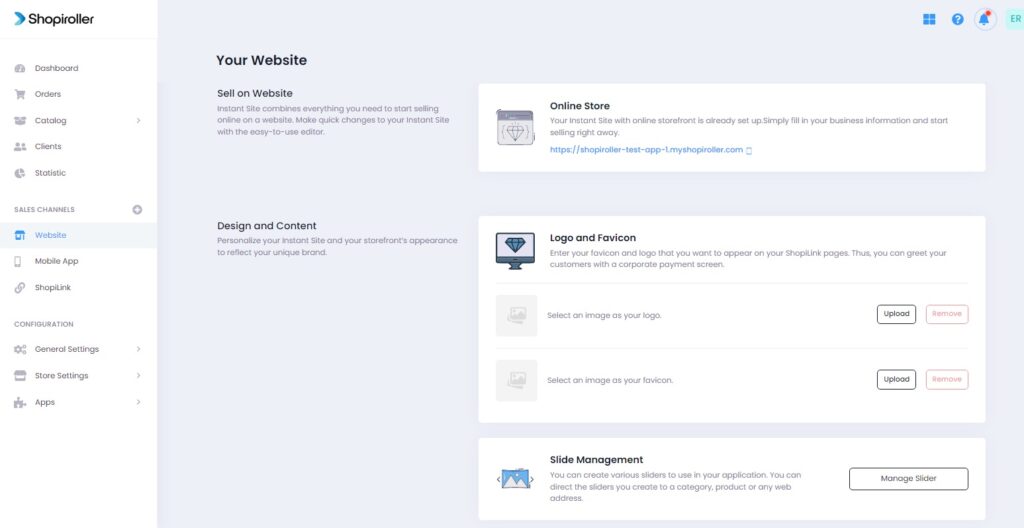
2) Click the Learn More button on the right of the Website text.

3) Upload your Logo and Favicon to the relevant fields on the screen that appears. If you want to use Slides in your store, click the “Manage Slider” button.
4) Click the Add New Slide Button.
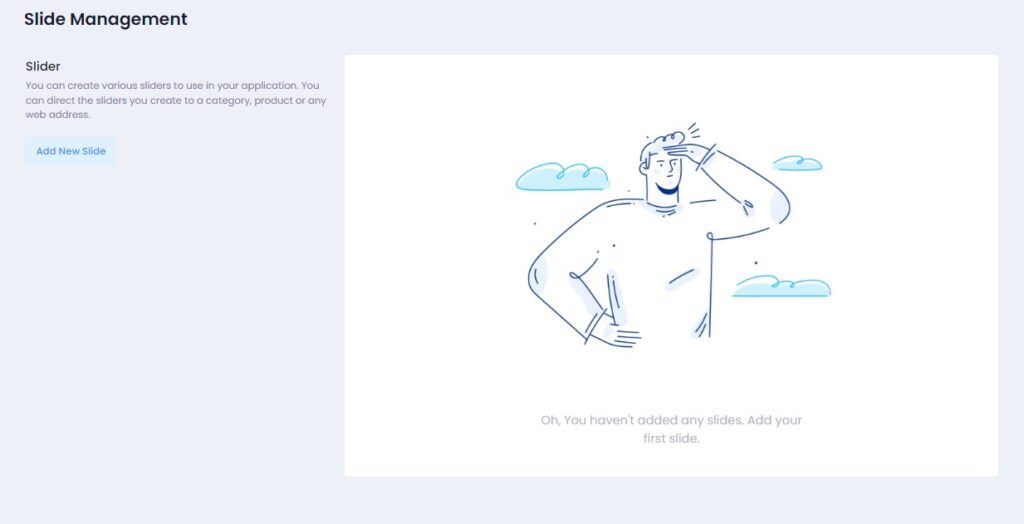
5) Select where you want the Slide to be displayed from the Target section and upload the images. After uploading the pictures, click on the Add Slide button.
NOTE: The total size of the images you add to this Slide must be no more than 4 MB. Otherwise, it will give an error.

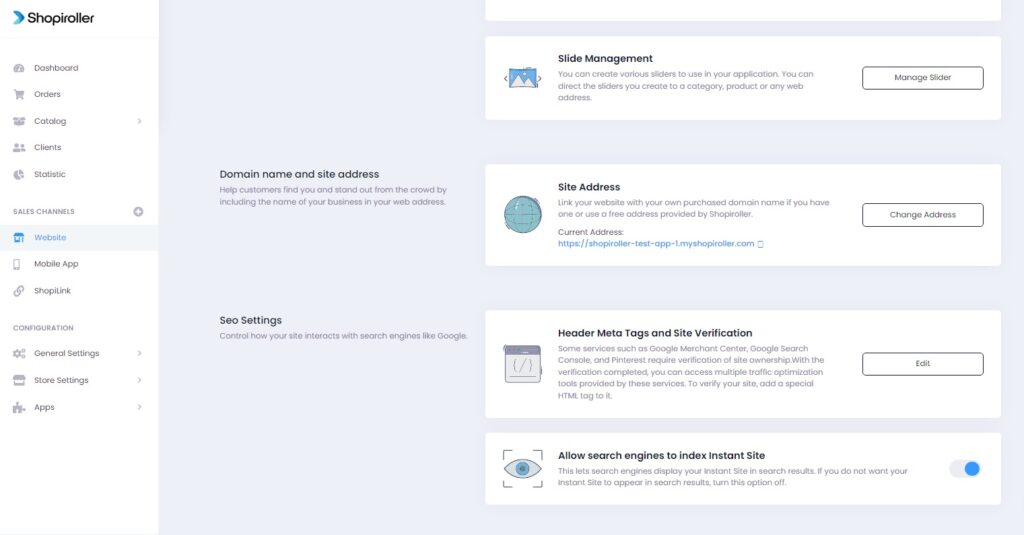
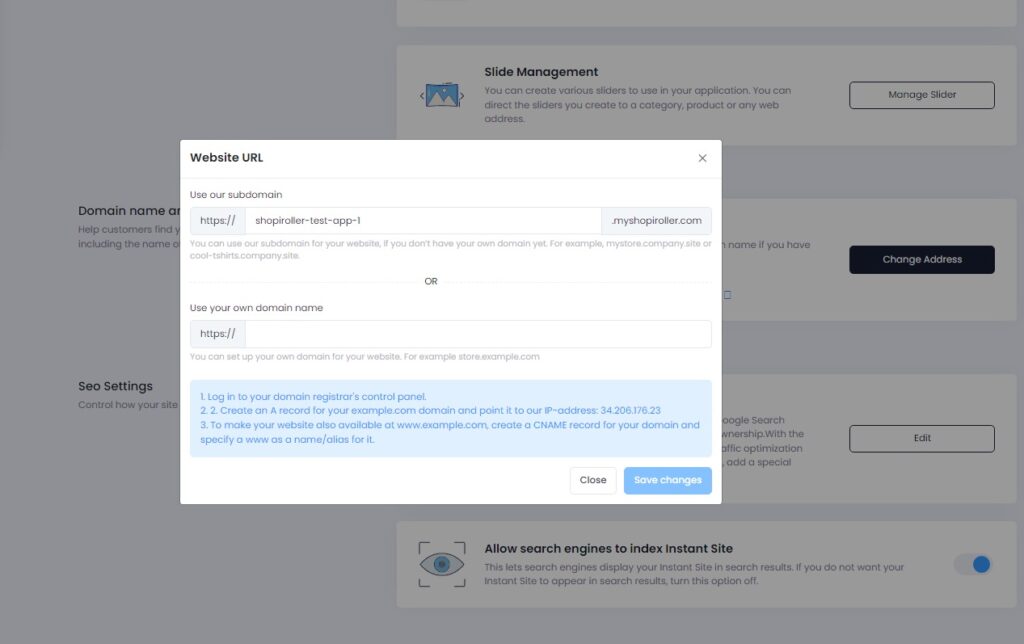
6) After Adding Slides, go back to the Website section. The link of your site will be generated automatically, but if you want to change it or use your own domain address, click the Change Address button.
7) Our system automatically activates the name of your store for you, but when you want to change it, you can write the name you want your store to appear under in the “Use Our Subdomain” section, or you can write your own domain address in the “Use Your Own Domain Name” section.
NOTE: If you want to use your own domain address, do not forget to do the operations in the area shown in blue. Otherwise, your products will not appear in your domain address.
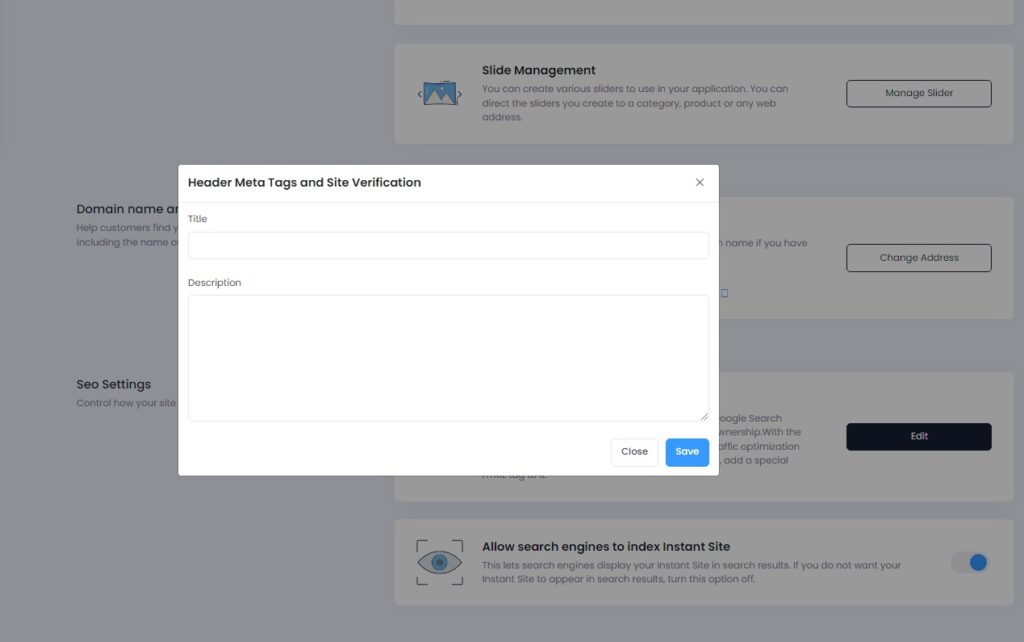
8) Click the Edit button next to the “Header Meta Tags and Site Verification” section. Some services such as Google Search Console, Pinterest may ask you to verify site ownership. In this case, you can enter the necessary information in the field below and click on Save.
9) If you want to allow or block search engines from indexing your site, you can enable or disable this option. If it is closed, your site will not appear in search results.
Now your e-commerce site is ready to use 🙂